Friday, September 28, 2012

How to Make Walls Happy

Give your walls art!  ;)

I'm kind of late posting this Friday, as I’ve been busy working!  I've been cutting and sticking and quilting and trimming like never before, as I’ve finally picked a date to open my Etsy store- October 10th!  I thought it was a fitting date, as it is the anniversary of me being a sole-proprietor, as you may recall (number 11 this time- was #10 really almost a year ago?  Crazy!). 

Anyhow, today I'm happy to present to you a sneak peek of a couple of items that are in store for the store (there are a couple more pictured on my Home Blog, too!).

As I’ve been collecting embroidery hoops for the major item in my store, I decided that it would be fun to also use them in a more conventional manner- wall art.  I’ve come up with a few fun designs, and since the sky is the limit, I’m sure I’ll come up with a few more in the months to come! 


First up, the pony design, of course!  She has a fairly straightforward design, though she did take a little longer than I'd anticipated (the first one is always like that!).  Still, I think she's pretty cute, and can see her in all sorts of colors!


Her 6" hoop was painted a robin's-egg blue using chalk paint, and it was sealed with local beeswax. 

Next up, the curled-up kitty design!  Yes, this one does resemble Jeanie… are you surprised?  But I shall do more cats in more colors & have fun mixing up the trims and such.  Her 9" hoop was rubbed with chalk and sealed with beeswax.  The bow is of vintage lace.


Okay!  That's all for now.  I've more work to do after I walk the dog and grab some dinner!   And stay tuned for more fun pictures next week!  I'm getting jazzed….

:)

Friday, September 21, 2012


Hi!

I'm still keeping busy, working on stocking the shop- I'm hoping to have things to show you next week- we'll see!  Gotta quick blog post for ya'll today,  just wanted to let y'all know that I'm now on Pinterest!  Well, I've been there for a few weeks, but I didn't really want to announce it until I had a few pins up.  I've got some fun home, craft & vintage stuff pinned there, and of course- horse stuff!   I'm still working on building up my collection there, but as it is such a nifty way to organize and share photos, you can bet I'll be pinning much more as I go along!  Click the pic for the link:


Or you can go to:   http://pinterest.com/brightlyhude/

Feel free to follow me there & enjoy!

:)

Friday, September 14, 2012

Carousel Day


Wow, what a fun Wednesday!  My friend Barb had the day off, so I played hooky and we headed down south to Albany, OR & Salem, OR, for a day of antiquing, food and carousels!  I had been wanting to take her to the Albany Historic Carousel & Museum since my visit earlier this year.  After finding a few treasures and having a tasty lunch at the local burger joint, we made our way to the museum where we wandered around for a bit longer than we meant to!  It was just all so fascinating- a project that really touched our hearts. 

You see, the Albany Carousel is a true community project.  It is an in-progress, 52 animal carousel project that is being run & crafted by volunteers.  And the time and attention these volunteers put into their pieces really shows!

The front of the museum, when you walk in the door, houses their painting department.  In the front window their were several finished pieces slowly drying.  They'd been painted in oils, and we were told that they needed to dry for some months before they got their heavy lacquer layer.  Volunteers were busy painting away at pieces big and small. 


To the left is a little room with vintage carousel pieces and displays.  Carousels have been around practically forever, and were very popular in the Victorian era.  In this room they have several neat examples of old pieces.  I loved this large gray horse- so very animated!


From the vintage room we went to the main workshop where the pieces were being carved.  They were in all stages of production- from completely finished like these pieces:


To others like this one who just needed paint:


Some were nearly there:


And all of the earlier stages were present too:


And of course, there were plenty of these guys floating around for reference!


One really cool item on display in this room was the mock-up of the carousel.  Man, it is going to be huge!  But just seeing how all of the pieces fit together is fascinating.


Another neat feature found in the room was a finished panel from the upper exterior of the carousel.  It was pretty nifty to see its size, and see all of the lights lit up:


I put a few more pictures of the museum on my flicker account.  Check it out to see more pieces in progress!  And if you are ever in Albany, I *highly* suggest taking a trip to its cute downtown area and checking out this museum!  For more info on the Albany Historic Carousel & Museum, or to get involved, donate or volunteer, please check out their website!


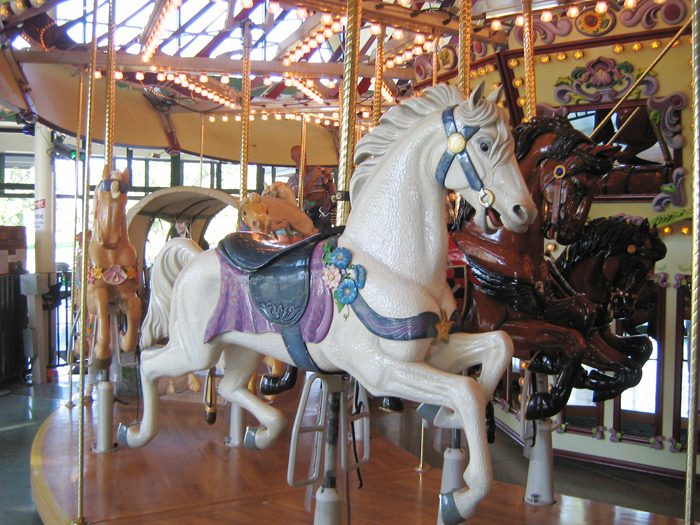
From Albany, we made our way north to Salem, OR where we stopped (and rode, of course) their community built carousel!  The Salem Riverfront Carousel was a blast to check out- a finished community project along the same lines as the Albany carousel.  This one was an all-horse 34 (I think that's what I counted) piece project with nods to the Oregon Trail (anyone else play that game as a kid?).  It was very cute, very shiny, and Barb and I had a grand time.  Here are a few shots of this finished work of art:


I noticed as I was getting off that they was a tiny rattie carved into the saddle of the horse next to mine.  There wasn't enough room for a direct shot, but I managed to snap one through a mirror:


Good times!  So, a little more antiquing, some tea and a slice of pie later, we were on our way home (well past Portland traffic time, thankfully!) happy for a day off spent in good company, seeing beautiful things.  And I, of course, am very inspired.

:)

Friday, September 7, 2012

Eye love it!


Happy Friday!

As promised, here is one of the finished blue eyes I spoke about, in a previous blog post.  I'd say adding a little more detail worked!  It didn't all fire away, like I thought it might, so I'm happy.  I may experiment sometime with adding a couple even 'bluer' streaks- we'll see!  But for now, I'll be content will a pair of pretty baby blues on Mr. Alphonse.

Also- here's a reminder that his auction & the others' end today!  The Jelli bisque ends at 6pm PST, Tootsie & Poppy end at 6:15, and Alphonse at 6:30.  Best wishes to all & happy bidding!

Jellibaby Bisque:

http://myauctionbarn.com/auction_details.php?auction_id=146769

Tootise & Poppy:

http://myauctionbarn.com/auction_details.php?auction_id=146770

Alphonse:

http://myauctionbarn.com/auction_details.php?auction_id=146771

:)

Wednesday, September 5, 2012

Shiny Time!

Hey, y'all!

The claybodies & Jelli bisque are now up on Auction Barn!  Check them out at these links:


No reserve on any of them- the auctions end this Friday, Sept. 7th starting at 6 pm PST, so get your bids in soon!  Thanks so much! :)

Friday, August 31, 2012

Coming Soon!

Hiya!

Well, the beasties are coming along!  I've been scritch-scratching away, and digging out my tiniest paint brushes; now they are nearly ready for glaze and one more trip (hopefully) into the fire!  Just a little more left to do on each of them (Alphonse is the furthest along), but I thought y'all would like to see their progress!

Tootise & Poppy mainly need some hoof-work, and a little mane/tail stuff:


Alphonse basically needs nose-pink! 


A close up of his detail- there's that eye from last week!


These pretties will be up at their respective auctions sometime next week (Tootise & Pop will be sold as a set).   I'll also be including a bisque Jellibaby in the mix. There will be no reserve on any of them- you set the prices, and shipping will be included!  I will make the announcement first to the Brightly Hude Yahoo group, then on to FB and the like.  So stay tuned for shiny fun!

:)

Friday, August 24, 2012

Blue Eyes Revisited


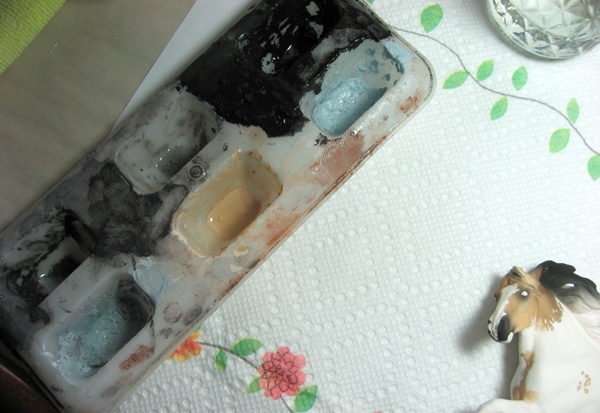
My trusty palette that I've been using since 2001… it's a popsicle holder!


You may remember a last year on this blog I did a post which mentioned my technique for painting blue eyes.  I thought I'd revisit that now and go a little deeper, seeing as I'm painting a horse with two!  I've been working to make my blue eyes even better over the years, and I'm pushing that a little more with Mr. Alphonse (who still needs a bit of scritching touch-up).  Hopefully it will all work out!  I took pictures so you could see, step-by-step, one of his little eyeballs becoming blue.  I'll be sure to show a close up of him when he's all fired so you can see how he turned out….


Step #1
The first step is always starting with a blank canvas.  I tend to do this before his paint is fired on, because it makes scraping it off so much easier!  I make sure that the area where I want eye white is truly scraped well- I can leave a little gray around the edges of the rest, as I will be painting gray next.


Step #2
I outline the shape of the eyeball with dark gray, as blue-eyed horses often have a gray outline (the shade varies) to their eyes.  It is handy to have lots of reference photos available, so you can check your work against reality.  I do like using a darker shade of gray, for contrast. 


Step #3

The gray 'circle' gets filled in with my blue/gray/white underglaze mix.  I do overlap the dark gray a bit, for blending purposes.  I tend to do 3 thin coats (or 2, if I got the paint a little thick).  The trick is to get solid coverage without getting it too thick.  I once had some blue just pop off an eye in the glaze fire because I went too crazy with layers!


Step #4
Blue eyed horses will often have darker blue and/or gray striations through their eyes.  I use a pure (baby) blue for a few stripes in the middle, to bring this out.  Here you can kind of see them drying (they dry rather quickly, so remember where you put them!). 


Step #5
Back to dark gray!  Traditionally, I've just done an outline of the pupil in a darker gray, before adding the black pupil on top.  After re-examining my reference photos, I've decided to push the gray out a bit more, and add some striations using a thin, thin brush.  Don't worry if a line gets a little too thick- you can use an x-acto to clean it up a bit, if you use a *very* light touch!


Step #6
I cleaned up my thin lines a bit, and added more gray to the middle of the pupil area.


Step #7
Add the pupil!  Do look at photos to make sure you've got it lined up right.  This will only take one coat of black, as black is quite opaque.  Yay- you're done!


Okay- hope this was a help to any of you artists who aren't too familiar with blue eyes in ceramic, or that it was interesting enough to those who are just plain curious!  Like I said, I will let you know how the extra little lines work out- if you can see them, or if they just fade into the eye after it fires.  I'm hoping I made them dark enough to stay- we'll see!

Stay tuned for more detail-oriented painting posts as I finish up the claybodies!

:)